There are times when an Excel schedule, as presented, is disjointed to the point of appearing much like some cubist painting.

The strange presentations are the results of efforts to accommodate data in a cell, table, or array, whose columns’ width in another place in the worksheet are either too wide or too thin. The result is that other elements on the report appear out of place and the presentation looks terrible. Nothing seems to fit properly.
As Accounting/Finance professionals, typically, we are not cubists!
From the following example, you can see 3 sections presented. Of necessity, the columns are wide to accommodate the third section. Those wide columns make the first two sections unnecessarily wide. This makes for a poor presentation!
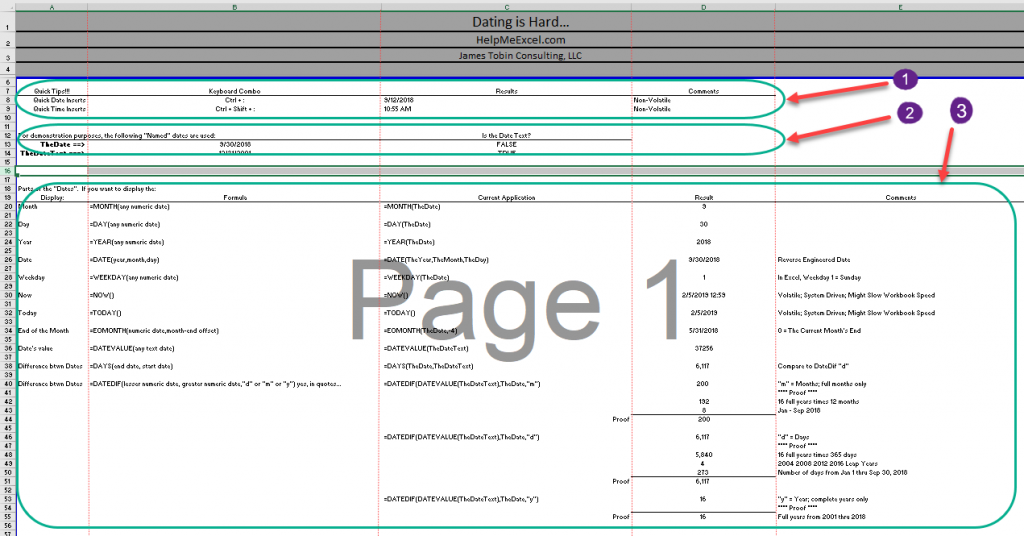
To remedy the poor presentation, I’ve seen worksheets that have scads of columns or various widths to accommodate the data for the presentation. To work in the worksheet, it was a nightmare moving from one presentation cell to the next.
I thought to myself that I could not be the only one experiencing this drama. I started looking around and discovered a “hidden” feature that would allow me to place dynamic data in a worksheet, without regard to the column layout. It’s called the “Camera” feature.
The “Camera” feature is not found in any ribbon. The only place to find and use the “Camera” feature is via Excel Options in the “Quick Access Toolbar” section.
Installing the Camera Feature
To install the Camera feature on your Quick Access Toolbar, follow these steps:
- From the Home tab, select the “File” tab to go to the Backstage view from the Info page.
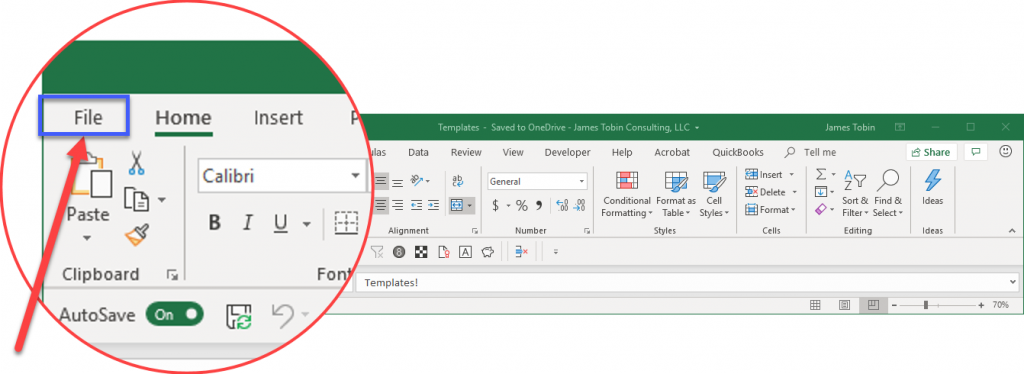
- From the Backstage view section, select “Options” to open the Excel Options window.

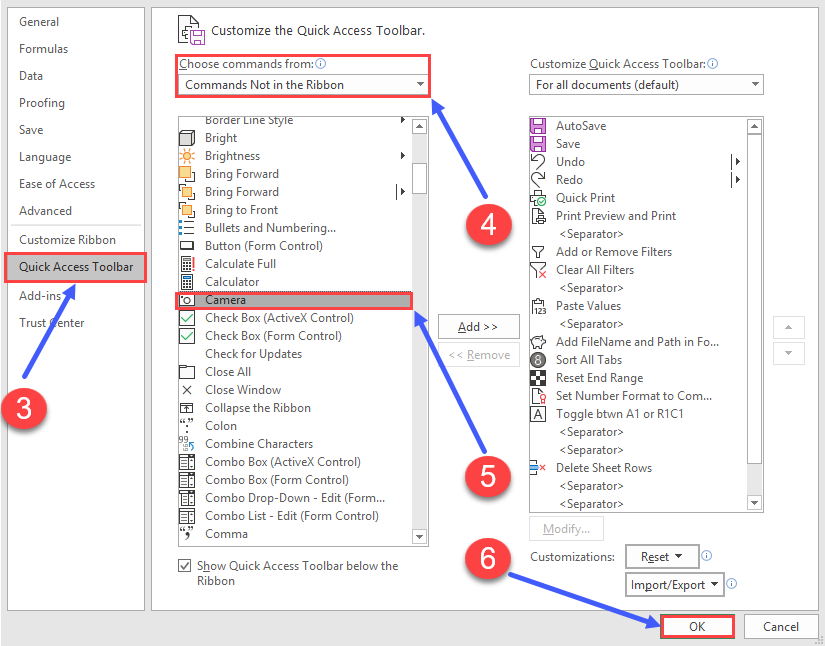
- With the Excel Options window open, from the left-hand column, select “Quick Access Toolbar”.
- Then in the section titled “Choose commands from:”, using the dropdown button, select “Commands Not in the Ribbon” (hence…”hidden”).
- Now that the hidden commands are now visible, scroll down and select “Camera”. You can double click “Camera” or use the “Add” button to install the Camera icon in the Quick Access Toolbar.
- Click “OK” to continue.
Using the Camera Feature
Now that the Camera icon is on the Quick Access Toolbar, how do you build the report?
There are two basic considerations for using the Camera feature to build a report. For each section, the calculations and the proposed presentation need to be in a different location than the final presentation worksheet. The two basic considerations are:
- A worksheet for each section (My recommended method); or,
- A single worksheet that includes all sections (Requires diagonal setup to avoid column width issues).
After preparing the sections to be placed in the final presentation worksheet, do the following:
- Highlight the section to be installed on the target worksheet.
- Click on the Camera icon newly found on the Quick Access Toolbar. Clicking takes a “picture” of the highlighted section (source).

- Move to the target worksheet and the specific location where you wish to place the “picture”.
- A small light cross (Crosshairs) will appear. Move the crosshairs to the location you want to place the “picture”.
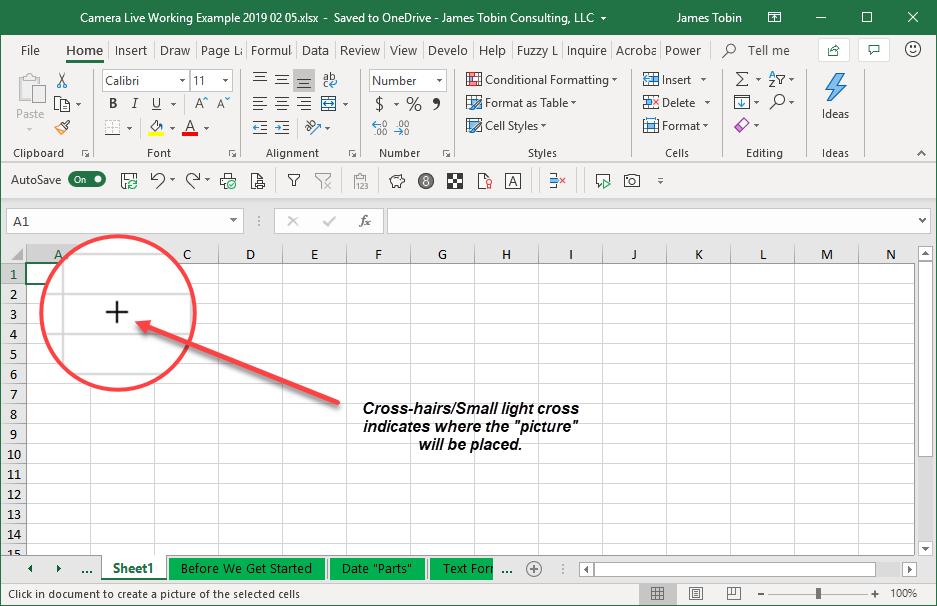
- As you click on the spot at that specific location, the “picture” will appear exactly as it was taken.
Unlike other “pictures”, you can return to the originally highlighted area and make any content or formatting change. Because the “picture” is dynamic, those changes flow thru to the target worksheet. If you wish to change the originally highlighted area, simply double-click inside the “picture” and Excel will take you directly to the originally highlighted area where you can make the desired changes to content or formatting.
As with any “picture”, right-clicking within the “picture” will cause the editing menu to appear. Selecting “Size and Properties…” and/or “Format Pictures” you can you can:
- Move it to a new location;
- Resize it;
- Add/Remove borders; or
- Add/Remove gridlines.
With the Camera feature, you can prepare presentations that are more appealing and don’t look like a cubist vision of reality!
Let’s See the Final Product!
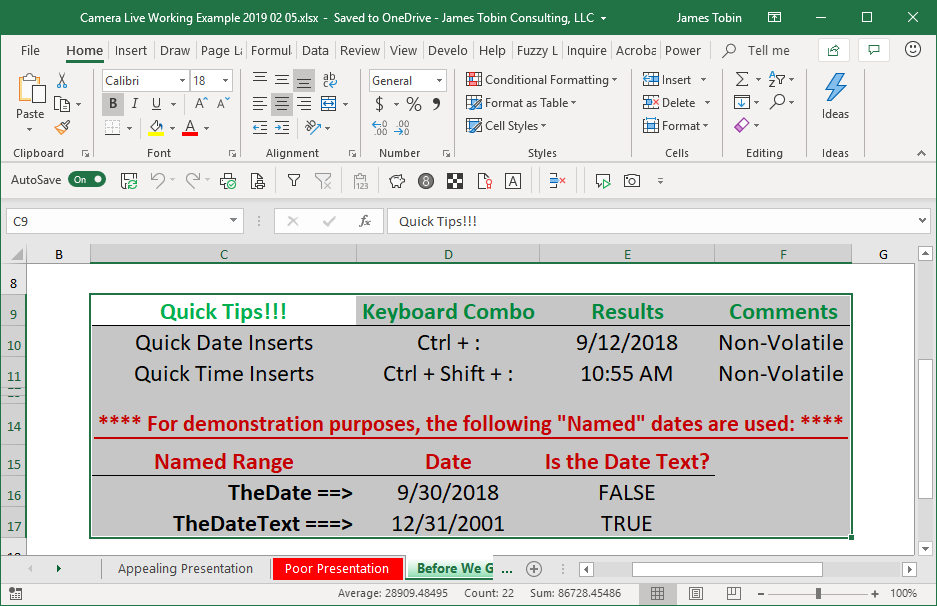
In the example above, the three sections presented yielded a poor presentation. From the working file, “Camera Live Working Example 2019 02 05.xlsx”, we can see how the presentation is markedly improved.
Let’s look at the final product….
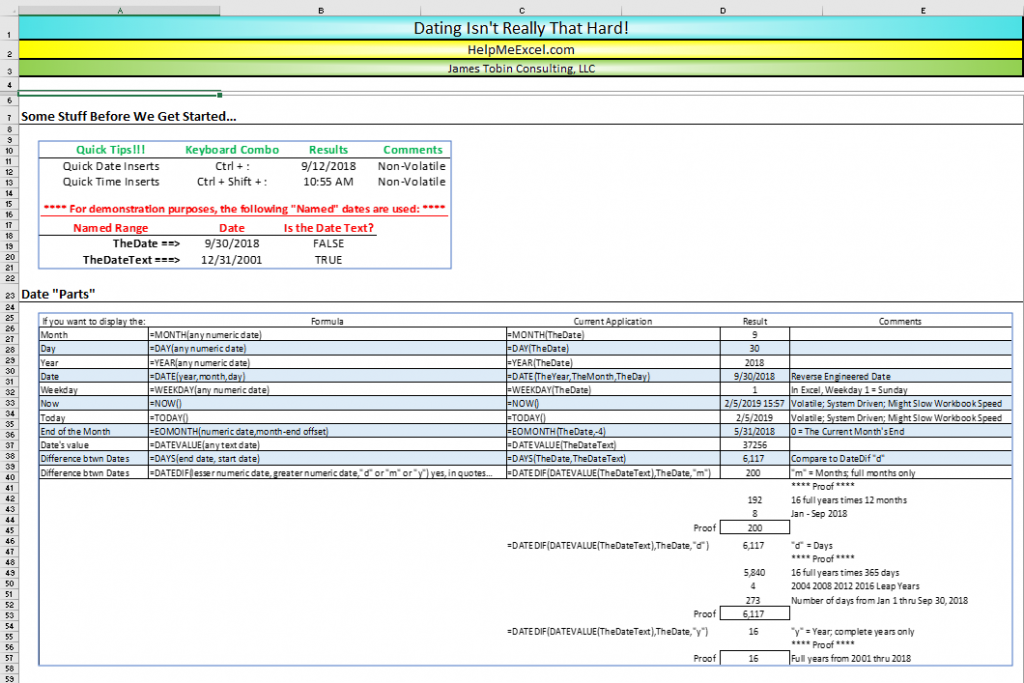
You can see that I’ve combined the first two sections. Also, none of the sections’ columns are dependent on data above or below.
No goofy column presentations!
For a workable example using the Camera feature, feel free to go to HelpMeExcel.com in the Tips and Tricks section and at the bottom of the Tip titled “Alright, Mr. DeMille, I’m Ready for My Close Up!” use the hyperlink to review/use a working Excel file titled “Camera Live Working Example 2019 02 05.xlsx” .
Click here to print a pdf of these instructions.
Click here to open the working Excel file titled “Camera Live Working Example 2019 02 05.xlsx”.
Leave a Reply